Yankee Ginger Snaps (and a bonus cookie)

This cookbook is ambitious and impressive. With recipes for wedding cake (all three tiers), apple pie, hot cross buns, sweet potato bread, red velvet cupcakes, beignets, cherry and roasted quince galette, fortune cookies, ravioli, calzones, bagels, and flourless double-chocolate brownies, Nancy Cain leaves no traditional bread product unturned in her new cookbook, Against the Grain.
Certainly gluten-free cooking is catching hold these days,
and when I had the opportunity to grab this cookbook, I did. While I am not
gluten-free, I have friends who are, so I want to have a reliable cookbook on
hand should I be doing some cooking for them. But even further, as a culture we
do have quite a reliance on wheat. While I want to support the most significant
industry from the husband’s home state of Kansas, I also think it’s important
to diversify one’s cooking—to not just rely on the standby, to mix it up. So
even if I can and do relish eating wheat, I am not at all averse to adding
gluten-free flours into my repertoire.

Immediately, I liked this cookbook. Delightfully, Cain gives detailed explanations as to why
gluten-free baking works (and sometimes doesn’t) with an extensive introduction
for the scientist in you. She examines hydration ratios, flour mixtures,
kneading challenges, pregelatinizing starches, and delayed fermentation all
with an eye toward making the best gluten-free products she can; and certainly
Cain has to stand behind these recipes, as she is the owner of Against theGrain Gourmet out of Vermont.
Committed to more natural cooking, Cain set out on her gluten-free
baking journey with a mission to make her goods gum-free. Further, she wanted
no mystery additives (you know, the ones you can’t even pronounce). Thus, she
eschews xanthan or guar gums in favor of well-chosen starches and proteins or
chia seed or flaxseed slurries. Further, she also explains the origins and
properties of a multitude of gluten-free flours—both grain and non-grain based,
including teff, corn, millet, oat, coconut, flax, amaranth, and quinoa. That
said, her recipes are straightforward, well explained, and easy to follow. In
sum, this cookbook is one you can turn to if you are gluten-free baking novice—
like myself— who wants to know why gluten free baking works, but also if you just
need to grab a quick recipe and rely on its success.

Finally, what I particularly like about this cookbook is
that before every one of her over 200
recipes, Cain tells a story in her headnotes. I love the stories behind food.
For me, as for any literature buff, food is never just food. It is about
consumption and denial, community and isolation, abundance and scarcity,
connection and detachment. (Her headnote for the ginger snaps talks about her
adaptation of an old Yankee Magazine
recipe and her family’s love of this particular cookie.) Cain’s stories are as
lovely as her scientific introduction, her extensive list of flours and
equipment, and her luscious photographs.
Okay, given all that, let’s turn to this post’s particular
recipe—Yankee Ginger Snaps

Two ingredients in this recipe may throw the gluten-free
baking novice for a loop: buckwheat flour and tapioca starch. Both can be found
at well-stocked groceries, health food stores, or online here or here. Buckwheat flour, it turns out, is not wheat at all,
which is confusing, given its name. Instead, the flour comes from a fruit related
to wild rhubarb and sorrel. Who knew rhubarb and sorrel were related? Further,
Cain by and large uses light buckwheat flour, which keeps baked goods a light
golden color. However, regular buckwheat flour works just as well in recipes
for darker goods. Tapioca starch (often labeled as tapioca flour) is ground
from the pulp of the cassava (or manioc) plant, the starch forms a gel when
heated, which is precisely what is needed to provide chewiness in baked goods,
such as cookies.
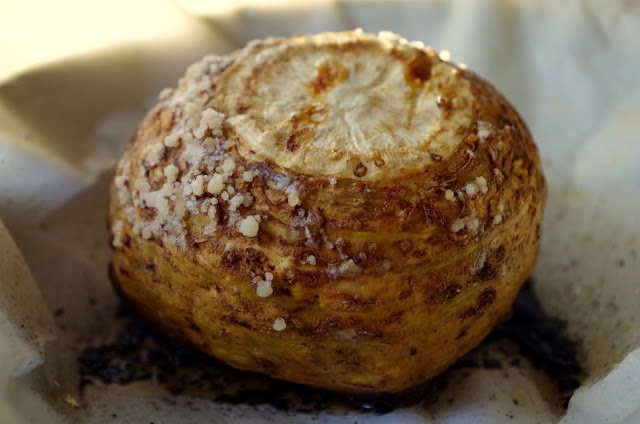
These cookies were quite yummy. Snappy even. I did put in an
additional teaspoon of ginger (note the range from 2-3 teaspoons of ginger),
for we are a family that likes a spicy cookie. The lower amount would make a
far milder cookie. The cookies were moist and chewy, rather than crumbly and
sharp. Thus, the snap in this cookie
comes not from the sound of breaking one into two pieces in order to dunk them
into your tea; instead, the snap comes from the bite of the ginger. I would
also argue that if you didn’t tell anyone these cookies were gluten-free, they
wouldn’t think to ask. It’s not that one needs to hide gluten-free cooking, but
it’s just that when one says ginger
cookie, one expects a ginger cookie. This recipe delivers, gluten or no.
And as a final note: we have made quite a few recipes from
this cookbook. While I think some tweaking is in order (definitely use light
buckwheat flour for the peanut butter cookies, cook the cheese bake just a
little longer), all in all, this cookbook is a keeper.

(I am going to tell you a secret: these gingersnaps weren’t on page 215. Classic Peanut Butter Cookies were. So, as I said, Cain generally uses light buckwheat flour, which wasn’t available to me, so I used plain old buckwheat flour. The flour itself is light and its taste blends right into the cookie; however, the color, especially for a peanut butter cookie, is off. Given that we eat as much with our eyes as with our stomachs, I chose to feature the Ginger Snaps. These peanut butter cookies look more like chocolate cookies. That said, the taste was great, and I am not going to deny you the glory of page 215 gluten-free peanut butter cookies. We all concurred that the recipe needed a little more peanut butter and a little less sugar. But more importantly, it needs light buckwheat flour. I am putting the recipe (without the changes to peanut butter or sugar) below.)

-------------
Yankee Ginger Snaps
Adapted from Against the Grain
Yield:
3 dozen cookies
Ingredients:
1 2/3 cups light buckwheat flour
1 cup tapioca starch
2-3 tsp ground ginger
1 tsp round cinnamon
2 tsp baking soda
½ cup canola oil
1 large egg
1 cup sugar, plus 2 Tbsp for rolling
¼ cup molasses
Instructions:
1. Position an
oven rack in the center of the oven and preheat to 350°F. Line two baking
sheets with parchment paper.
2. In a large
bowl, blend the buckwheat flour, tapioca starch, salt, ginger, cinnamon, and
baking soda. Set aside.
3. Using a hand
mixer or a stand up mixer, combine the oil, egg, and 1 cup of sugar in a medium
how until the batter Is light yellow. Beat in the molasses. Stir in the dry ingredients
until the dough is fully blended (Cain suggests working by hand because the dough
will be quite stiff, but I used the stand mixer the whole time).
4. Form the dough
into 1-inch balls and roll them in the remaining 2 Tbsp sugar. Place the balls
about 2 inches apart on the baking sheets.
5. Bake the cookies
for 10-12 minutes, rotating the sheets halfway through. The cookies will spread
a little and be soft and fragile when you remove them from the oven. Allow them
to cool for about 5 minutes, then transfer to a cooling rack.
Classic Peanut Butter Cookies
Yield:
20 Cookies
Ingredients:
4 Tbsp salted butter
¼ cup coconut oil
½ up packed brown sugar
½ cup granulated sugar
2 tsp vanilla extract
1 large egg
½ cup organic natural peanut butter
¾ tsp baking soda
½ tsp salt
1½ cups light buckwheat flour
½ cup tapioca starch
Instructions:
1. Position an
oven rack in the center of the oven and preheat to 350°F. Line a baking sheet
with parchment paper.
2. In a bowl,
use a hand mixer on high to cream the butter, coconut oil, sugars, vanilla, and
egg until the dough is light and creamy. Mix in the peanut butter until
thoroughly blended. Beat in the baking soda and salt.
3. Beat in the
buckwheat flour and tapioca starch. The dough will become very stiff; use your
hands to gather it into a ball.
4. Roll the
dough into 1 ½-inch balls and place them on the baking sheet. Using the tines
of a fork, press down each ball until it is between ¼ and ½ inch thick. (The
cookie will spread some as it bakes.) Turn the fork 90 degrees and press down
the tines again to create a crosshatched pattern on the top.
5. Bake the
cookies for approximately 15 minutes, or until the bottoms are lightly browned.
Allow the cookies to cool for 5-7 minutes on the pan before transferring them
to a cooling rack. The cookies will be soft and fragile when removed from the
oven, but will set and harden as they cool.


Comments
Post a Comment